Cash Bakery

Its actually my little kitchen that I experience all kinds of recipe that I come across. Its also the place where I make favourite food for my loved ones.

Homemade Kueh Pie Tee

An excellent party food affair that involves hands on by your guests. They are thin and crispy pastry tart shell filled with a spicy, sweet mixture of thinly sliced vegetables and prawns.

Bamukuchen

Baumkuchen is a kind of layered cake. It is a traditional dessert in many countries throughout Europe and is also a popular snack and dessert in Japan. The characteristic rings that appear when sliced resemble tree rings, and give the cake its German name, Baumkuchen, which literally translates to "tree cake".

Wednesday, 4 June 2014

Ice Pop ~ Green Bean Flavor

Ice Pop

Is the weather too hot to bear? Especially when the ministry of environment keep warning us on the prolong hot weather for the next 4 months... Do you wish to have something cold to chew on?

First thing come into my mind are those ice pops/popsicles that we used to eat when we were young (of cos not referring  to those 90s when they only know ice cream).

Ice Pop is basically a popsicle made usually from anything like juice with fruits or any sweet dessert or anything you can think of like sweetened young coconut water with shreds of young coconut meat. I used to eat the kind with sour plum juice, they are especially refreshing.

In this post, I would like to share the green bean flavor. First of all you have to make the green bean soup, where you can find my recipe here. 

Instruction:
1. Fill up the mixture into a single ice pop plastic bag tube (a funnel would be), secure and tight up with rubber band.


If you are in Singapore, you can get these plastic bag from SKP. I believe in modern days now, you will use those pretty color popsicle mold instead of my traditional plastic bag tube. However, the plastic offers a little built in protection from sticky fingers, and they can be totted around for a picnic or backyard barbecue with little fuss. 

2. Freeze for about 3 hours/overnight or until sets.
*for the big batch definitely needs to freeze longer.

Enjoy!!! and Lets endure the heat together!!!!

Thursday, 29 May 2014

Green Tea Soufflé

Souffle

I was looking at this recipe from Just One Cookbook and inspired me to try doing this amazing green tea flavour soufflé. I actually planned for one week to do this, first I did research on many other recipe and of cos I found my favourite Michelin Chef Gordon Ramsay's video and boost my confidence to try it on. Then I plan to get the green tea powder which is not usually found at the local supermarket, so I have to get down to the Japanese supermarket in town like Isetan or Meidiya. Then I have to combine both the recipes and techniques from the 2 chefs above into one.

That's it for my long winded process....


Let's move on to the recipe which is adapted from Just One Cookbook and with my additional tips.


Before you start, I would advise you to watch these 2 youtube, then you will have a smooth sail during the whole process...


Serves: 4 (3 inch diameter ramekin)
Ingredients
For coating ramekins

unsalted butter, at room temperature
2 tbsp. granulated sugar
1 tsp green tea powder (optional)

Mix the sugar and green tea powder in a small bowl. Brush the ramekins with butter, using upward strokes
. Put in the mix sugar and green tea in one ramekin and rotate the ramekin to dust the insides and pour the excess to the next ramekin and so on. Chill in refrigerator to set.


Things to take note:

1. Make sure the ramekin is dry before you brush the butter over, this is to ensure the soufflé rise evenly.
2. Make sure you brush the butter using upward strokes, this technique will push the 
soufflé up during baking.


3. Make sure you coat the whole inside of the ramekin from the bottom to the top edge, so they can rise evenly.
For the Soufflé
150 ml milk
100 ml heavy whipping cream (double cream)
3 large yolks
22 g granulated sugar
15 g all-purpose flour + 10 g corn flour
1 Tbsp.green tea powder

3 egg whites
44g (4 Tbsp/1.6 oz) granulated sugar

For dusting

1 Tbsp. powder (icing) sugar
Instructions

1. Preheat oven to 200C.


2. Prepare the Ramekin.


3. Whisk egg yolk and sugar in a heatproof bowl until pale and thickened slightly.

4. 
Sift the flour into the egg mixture and mix well.


5. Heat the milk and heavy cream in a small saucepan until almost boiling.


6. Add a splash of hot milk mixture into the egg mixture and whisk well until the mixture is smooth. Then gradually whisk in the rest of the milk mixture.


7. Pour the mixture back into the saucepan. Whisk the mixture ALL TIMES over a medium-low heat for 2-3 mins until thickened and smooth. KEEP WHISKING during this process otherwise your custard will overcook and become clumpy.


8. When the custard has thickened, immediately transfer to a bowl (otherwise remaining heat from the saucepan will “overcook” the mixture). Cover with plastic wrap and cool to room temperature (you can put in the fridge to make this process faster).


9. Once the custard has cool down, sift green tea powder into the custard.


10. Whisk the egg whites in a clean bowl till bubbles start to form (Kitchen Aid mixer Level 3 for 2 minutes). Start adding sugar gradually a spoonful at a time. Once you add all the sugar, increase the speed to Level 8 and whisk to make a firm, glossy meringue, about 3 minutes.


11. Whisk ⅓ of the meringue into the custard and mix until homogenous.


12. Very carefully fold in the rest of the meringue using a rubber spatula. Do not over mix.


13. Spoon the soufflé mix into ramekins until half filled. Tap them on the work surface so it filled the bottom of the ramekin well and it will rise nicely in the oven. Fill in the rest of the soufflé mix to the ramekin until it is fully covered. Finally run the thumb around the edge.
p.s if its difficult to understand, please look at the Gordon's video.


14. Place the ramekins on a baking tray and bake for 12-15 minutes until well risen and slightly golden on top. The souffle should wobble gently in the middle when it’s ready. 


15. Finally dust with powder sugar and place on a plate and serve immediately.


This time round I managed to record how the sexy soufflé rise in the oven. So please do click on the youtube link below and enjoy....

Can you see the souffle were dancing in the oven near the end of baking time?

If you ask me what is the secret to making a successful soufflé, I would say that's because I were singing to them so they can feel my love and dance to the top and rise... :)

Sunday, 4 May 2014

Bacon Egg Muffin with Mushroom Sauce


This is actually a pretty simple breakfast to do with many kind of varieties that you can try around, you can add sausage in it or use quail egg instead of egg and etc.

For my case, I think with some mushroom sauce will be perfect as it will not be too dry to eat on its own and its an addition of nutrition.

The following recipe is for a couple portion. However you can do one whole dozen of the muffin and and eat it as it is without the mushroom sauce or adjust to your liking.

Ingredients
2 slices of bread
4 slices of bacon
2 eggs
salt and pepper
dried parsley

MUSHROOM SAUCE
350g white button mushroom (or your choice of mushroom), thinly sliced
1 tbsp butter
250 ml chicken stock
1 tsp corn starch
1 tsp garlic powder/1 clove garlic

Direction
1. Cut circle (slightly bigger than the bottom of muffin cup) out of each piece of bread. Grease the muffin tin and press the bread in the muffin cups. Place in the oven and bake at 180 degree Celsius for 5 min and then remove from oven.

2. Slightly pan fried the bacon around 5 min or until slightly crisp. Place 2 slices of bacon on top of the bread so they wrap around the sides to form a cup.

3. Crack an egg into each muffin cup. Remove some egg whites if its too excessive.

4. Bake in the oven at 180 degree Celsius around 15-18 min until the eggs are set.

5. Heat up a pan and melt the butter. Add the sliced mushroom and garlic powder and cook until fragrant. Dissolve corn starch in a small amount of water and add to chicken stock. Gradually add chicken stock and continue to stir and cook until the sauce is thickened. Add pepper and parsley to taste.

6. Place the bacon egg muffin on a plate and sprinkle some dried parsley on the egg and season with salt and pepper. Pour the mushroom sauce over it and ready to be served.


Friday, 2 May 2014

Mini Napoleon Strawberry with Lemon Curd


I have always thought of making puff pastry desserts at home, however the thought of making the pastry has deterred me from starting one, until I found this frozen puff pastry sheet at the local supermarket and they turn out to be pretty fluffy. I was so happy with the outcome and I have started to try out a series of pastries and this time round I am sharing with you a Mini Napoleon Strawberry with Lemon Curd.


Ingredients
1 packet of pastry sheet
Icing sugar
1 box of strawberries (~500g depending on the size) you can always replace with raspberry or blueberries

LEMON CURD

4 egg yolks
100g caster sugar
2 tsp lemon rind
4 tbsp lemon juice
120g cold unsalted butter, chopped to small pieces

Direction

1. First of all you need to take out the frozen pastry from the freezer and let it thaw at room temperature for 2 hours.

2. In the meanwhile, lets prepare the lemon curd so it has time to cool down and in time to use (you can prepare one day in advance too).

   -> Whisk egg yolk and sugar in a heatproof bowl until pale and thickened slightly.
   -> Whisk in rind and juice.
   -> Stir with spatula over simmering water about 10 min or until it coats your spatula.
   -> Remove from heat and gradually whisk in butter piece by piece until well combined.
   -> Set aside to cool and refrigerate.

3. Preheat the oven to 220 degree Celsius.


4. Roll out the sheet into 3mm thickness and cut into 4cm x 12cm. Place on the baking tray with baking paper and dust the top of each pastry with sifted icing sugar. Refrigerate for 10 min and bake pastry for about 15min or until it brown slightly. Leave to cool.

Note: You can always cut the pastry into your desired shape and you may want to follow the instruction of the frozen pastry puff you bought.


5.  Using a serrated knife, carefully split each piece in half horizontally. Spread a thin layer of lemon curd on the bottom pastry and then place 2 strawberries at two ends. Squeeze more lemon curd in between the strawberries and spread a thin layer on top of the strawberries so the top pastry can stick to the strawberries. Dust some icing sugar on top of the puff. 


The following video can help to explain better:
http://www.youtube.com/watch?v=besqto20y5s

6. Ready to be served or you can keep in refrigerator to be served later.


Bon Appétit!!!!

Sunday, 13 April 2014

Pomelo Mango Sago

Mango Sago dessert

This is a very famous HK dessert that you usually wont miss every time you visit the place. Luckily the famous dessert stall 满记甜品 came in to Singapore few years ago to relieve our cravings.

But how about we can actually make this at home especially for us who live in the tropical countries which has abundant of good quality of mangoes around. As you know this dessert success depend on the most important ingredient MANGOOOOO.

So let me have the honour to show you how can you do it... of cos you can improvise to suit your taste from here...

Servings: 6

Ingrediets
400ml mango juice (you can use those marigold mango juices that you can get from supermarket)
200ml coconut milk
80-100g sago pearl (depending on how much you love this)
4-5 cups of water to cook the sago
1 to 2 cup of Pomelo arils
3 large ripe mango (sliced and cubed)
sugar syrup (2tbsp sugar + hot water)

Directions
1. Cook the sago:
    - Boil the water.
    - Add in sago pearl and bring to boil and stir well to prevent them from sticking together.
    - Once it boils,  turn off the heat and cover with lid for 20min.
    - Turn on the heat and bring to boil again and stir well to prevent them from sticking together.
    - Once it boils, turn off the heat and cover with lid for 10 min.
    - Drain the sago and rinse to remove the excessive starch. Soak in cold water and drain when completely        cool. Set aside and keep in refrigerator.

2. Cut the mango while cooking the sago. If you want to know how to cubed the sago, this youtuber show you how... Separate 2 mango for blending and 1 mango for garnishing.
http://www.youtube.com/watch?hl=en-GB&gl=SG&v=lvLdPjpELyU

3. Bring coconut milk to boil and set aside to cool.

4. Blend the 2 mango and cool coconut milk till smooth. Add some sugar syrup if its not sweet enough else you can skip this. Add the sago and stir well. Set aside and keep really chill in the fridge, the cooler it is the more yummy it is. At this stage, your dessert is almost done until serving time.

5. To serve, in a bowl add mango juice and then the mango mixture and garnish with mango cube and some pomelo. Enjoy...


Monday, 7 April 2014

Devillish Chocolate Cake


Do you love to eat chocolate cake that has the characteristic of a devil? The one that we will exchange our diet soul with?
Don't miss this super moist chocolate cake that will melt in your mouth ...


Over the years I have tried a number of recipe for chocolate cake, especially looking for the one with a very moist texture something like the Awfully Chocolate if you know the brand.


I derived the following recipe from this blogger AUNTY YOCHANA.
I have used her chocolate sponge cake recipe with some amendments as she has the best result for all the chocolate sponge cake recipe I have tried for so many years. Maybe you can find some good stuff in her blog as well.

I have changed her recipe to fit 6 inch cake tin.

CHOCOLATE SPONGE CAKE

Ingredients
A.
2 egg yolks
50g castor sugar
25g cooking oil
1/2tsp vanilla essence
60g self raising flour
1/4tsp baking powder
1/4tsp bicarbonate soda
a pinch of salt
B.
15g cocoa powder
60g hot water
1tsp instant coffee (dark coffee is preferred)

C. Meringue Mixture
2 1/2 egg whites
1/2 tsp cream of tartar
30g castor sugar

Direction:
1. Mix B and stir until smooth. Preheat the oven to 170C or 175C depend on your oven.

2. Mix and shift the dry ingredients in A and set aside. Beat egg yolks and sugar with wooden spoon till pale.Add oil and mix until smooth. Add the dry ingredients and mix until smooth. Lastly add the vanilla essence and mix for a while.Add the cocoa mixture and mix together till smooth.

3. Beat egg whites with cream of tar tar for 2 min then gradually add the sugar and beat until fluffy but not too stiff.

4. Add 1/3 of the egg white into the egg yolk mixture gently blend well with a whisk. Then add the rest of the Meringue 1/2 at a time and fold with a spatula and remember not to over mix else the cake will be deflated. Pour into 6 inch tin until 75% full and bake for 35-37 minor until cooked. When they are done, place them on a wire rack and leave to cool, and then cut the cake into 2 layers. (I used this cake slicer to help me)


For the Chocolate Mousse I have used the instant mixture from NESTLÉ Docello that make my life so easy and they actually taste really good. There is youtube to see how you can do it too... However I have only used 1/5 portion.
http://www.youtube.com/watch?v=9dNsRxGqFe4


5. Spread the mousse in between the cake layer and all around the cake. Keep in the refrigerator till the mousse sets.
Note: If you are lazy to do chocolate mousse, you can actually use the chocolate glaze to spread between the cake layer and all around the cake. After all its homemade you dont want to get too complicated.


Dark Chocolate Glaze
150ml Double whipping cream
150g dark chocolate with at least 65% cocoa (cut into small pieces if necessary)
50g unsalted butter
1tbsp corn syrup (to make the dark chocolate glazing)

Bring the cream to boil and pour onto chocolate and leave to settle for 2 min. Whisk the mixture well, add the soft butter and mix well and lastly add the corn syrup and mix well. Do not over mix to avoid getting too many bubbles in the mixture. Use immediately.

6. Finally glaze the chocolate cake with Dark Chocolate Glaze by pouring from the top of the cake and let it flow down the side smoothly. Decorate the cake with some sprinkles from Wilton and refrigerate to set.
P.S. I love to add cashew nuts on my chocolate cake and you can decorate the bottom of the cake with the nuts to hide the unevenness of the coating :)


Hope you will try out this recipe and share with me the result on my facebook.

Thursday, 3 April 2014

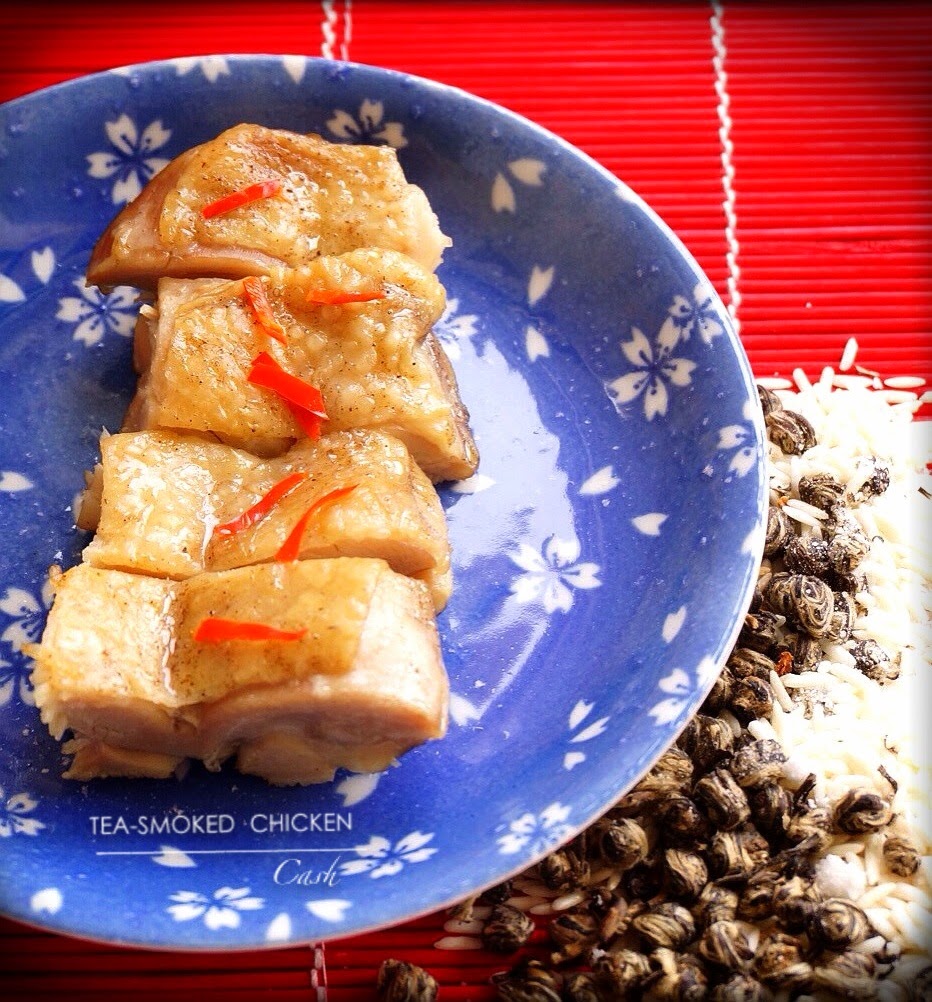
Tea-Smoked Chicken

smoked chicken

I love to eat this dish with porridge... I know it sound weird... but I find them to be a perfect match...

The challenging part of this dish is smoking the chicken... You may have house full of smoking tea..
Other than that its as easy as ABC...

The following recipe is for 1 kampung chicken. Sometimes I did it with boneless chicken leg only as I was just preparing for 2 person...or maybe sometime I am unable to get a good kampung chicken. Do adjust the ingredients accordingly...

Ingredients
1 Kampung Chicken (not too big)
2 tbsp of five spice salt (you can substitute with salt + pepper if you really cant get the spices salt)

2 tbsp Pu-er Tea/Tie Guan Ying/Green Tea
2 tbsp rice
2 tbsp brown sugar

Directions
1. Season the chicken inside out with the spice salt and marinade for at least 4 hours.
In my case  I add more pepper for my own preference.

2. Steam the chicken over boiling water (not cooked in boiling water) with breast side up for 40 minutes or until the chicken is cooked. Strain the sauce from steamed chicken and set aside.

3. Line the bottom of a wok with heavy duty foil, add tea leaves, rice and brown sugar and combined well. Arrange a metal rack in the work, about 2 inches above and place the cooked chicken with breast side up on the rack. Cover with lid and smoke with high heat for 5 min until the smoke begin to appear. Remove from heat and continue to let the chicken smoke inside the wok for another 10 min. 
Note: Sometimes when I am lazy I did it over the oven, with the tea at the lower rack and chicken on the higher rack. But I preheat the oven with the tea leaves first before I place the chicken in.

4. Chop the chicken and pour the sauce over and ready to serve.


Twitter Facebook Favorites More